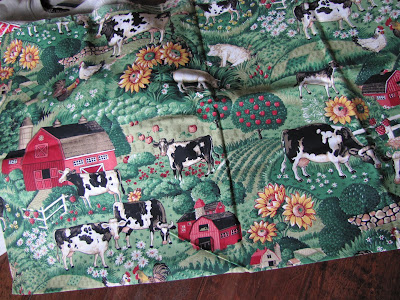
Welcome friends from The T-shirt Diaries!! I am so excited to share how I made this cute apron using only supplies I had in my stash of crafty stuff. I think it turned out really cute and my niece will look like an absolute doll in it when she is doing her arts & crafts! I lined it with a thick cotton (or maybe it is canvas?) so that way when Bella is working on a messy project, her clothes are still protected because the cute fabric was pretty thin.


So, here's the deal. This is probably the most detailed item I have sewn so there are quite a bit of steps. I am usually a sew straight-line-projects-only kind of girl so this was certainly a bit more challenging for me to figure out as I went along. So I hope I don't scare anyone off BUT if I can handle it, then I am pretty sure anyone can tackle this little project. There are lots of optional fun frilly stuff I added on the apron so a newbie can pare down the project and make it much easier!
Let's get to it!!!!
Supplies:
-super cute fabric
-thicker canvas type fabric for backing
-3rd complimentary fabric for waist band
-ribbon
-fusing
-normal sewing supplies (including a heavy duty needle)!!
1.
Cutting your pieces:Using the thick backing, I traced an apron I already had so I could use that as my pattern.

I only traced the right half of the apron, marked the half-way paint at the top and then folded the material over vertically. Then I cut both layers along the marks I made. When I unfold it, ta da!!, we now have a full (and hopefully symmetric!) apron piece.


I used the piece I just cut as a pattern to cut out the front piece of the apron using your super cute fabric.

2.
Making the decorative waist band: I cut out a strip of my brown material for the waist band. My finished band was about 2 inches so I cut it 2.5 inches wide so I could fold the edges under for a nice finished edge. You can adjust the width of this band relative to how wide your ribbon is! After folding under the edges and ironing those edges down, follow instructions on the package for the fusing to iron it to the apron. I kind of guessed where to put the waist band compared to where the ties were on the original apron (and guessed a little too high!).

I measured the original apron ties and distance across the belly of the apron and cut my ribbon to that total length. Then I pinned the ribbon across the waist of the apron, making sure the ribbon was placed evenly so the ties will be the same length on each side of the apron.

Now it is time to sew! Sew down the edges of our waist band (my brown piece) and sew along the edges of the ribbon. DO NOT sew the edges of the ribbon all the way to the edge of the apron (see picture!) because you need to save room for the seam allowance and you don't want the ribbon to get sewn into the seams. At least I don't think that will work, but I am no expert on sewing! :)

3.
Ruffle Time!I wanted for this apron to have a pretty substantial ruffle trim. So I made long strips that were about 4 inches wide. You will probably need the length strip to be 2-3 times the distance around the edge of the apron. I had to sew two lengths together since I was using scrap material! Then I folded them in half, wrong sides together, and pressed.

Set your machine stitch as long as it will go and the tension as tight as it will go. Sew along the non-folded edge of your strips to ruffle those pieces up. This was my favorite part of the project!
Now pin the ruffle onto the right side of the front piece of your apron so that the non-folded edge is along the edge of the apron. Your folded edge of the apron should be towards the center of the apron. I only put the ruffle from waist band to waist band and not on the 'chest' portion of the apron. Sew along edge.

4.
Adding Neck Ties:Cut two pieces of your ribbon for the neck ties. Each of my ties were about 8 inches, but this will probably depend on how big your child is! Pin each tie face down to the top edge of the apron.

Since we are about to sew in the lining, I took all the ribbons and pinned them to the center of the apron so they were out of the way and wouldn't accidentally get sewn into a seam somewhere.

5.
Sewing the Lining:Almost done now! At this point, you will probably want to use a heavy duty needle on your machine!
Place your front apron piece face up on the floor (or table if you are fancy and have lots of space!). Then place the lining face down atop the lining piece. Pin together. Sew around the edge, leaving a 2-3 inch opening to turn the apron right side out.

Trim excess material around the edges and clip corners. Turn the apron right side out and use a pointed item to turn out edges. Then iron to get the seams nice and neatly lined up. Pin the hole and top stitch all the way around so the hole is sewn closed and there is a nice finihsed edges around the apron.
6.
Finishing the Ribbons:Lastly, you will want to sew the edges of the ribbons to keep them from fraying. I just folded each end two times and ziz zag stitched the ends. Very easy!

Done, done, done!!


Wowee...that was a longer project than I usually do but it was well worth it! If I was more confident that this was going work out well, I would have appliqued 'Bella' on the lining to make this a reversible apron. Or I could have used a freezer paper stencil to paint her name on it. Oh well...maybe next time!
Good luck! I hope these directions make sense. If you make an apron, I would love to see how yours turned out!
I link up to
these parties!


