Showing posts with label boy clothes. Show all posts

Oct 17, 2011

Dinosaur Costume

Can you believe Halloween is almost here?! I have been a slacker and haven't done any fall/halloween activities with the boys. :( I did, however, make a costume for John! He has been saying for about a month he wanted to be a clown for Halloween. I kept asking him hoping he would change his mind and FINALLY he said he wanted to be a dinosaur. WAY cuter than clown! So, I made him this cute costume.


Now, before you think I am super creative, I totally got the intructions for the hoodie from DIYing to be Domestic. The only thing I added was the grey felt to the tummy. Since she has very easy instructions, there is no need for me to type them up!

I got the basic idea for the tail from The Train to Crazy but modified it slightly. I didn't make the waist band. Instead I sewed mitten clip thingies on the end of the tail and clipped the tail to John's shirt under the hoodie. Very simple.

So, starting with this plain hoodie from Walmart...


came this sweet stegosaurus...


And let me tell you, John LOVED this costume! He wants to wear it all the time. I was worried I would put in all this hard work (all 60 minutes of it!!!) and he wouldn't wear it. So, I consider this a total success. I thought I might rip out all the stitches after Halloween and get this back to the original blue hoodie so he can wear it, but my sister said it was so cute and he could wear it as it. Well, we might just do that. John can be a cute dino all winter long!


Please be a fan of lil Mop Top on facebook!! I link up to these parties!

Jun 21, 2011

Pirate Party Shirt [Tutorial]

Remember these precious pirate party invites? Well, here is another little sneak peek for you!

Big Brother can't go to the party without his very own pirate shirt! Matty B will be wearing a water shirt with a skull and bones, so he is set. So I wanted to make sure John was festive too! This is what I came up with...trying not to make it to 'skull-y' because I don't really love skulls on babies. :)


I think this shirt turned out with a perfect mix of pirate and party. Don't you?!

So, let's get down to the nitty gritty of how to make this precious shirt. (If you aren't super crafty and want to buy one of these pirate shirts, go HERE!)

Supplies:
-t-shirt (I got mine at Walmart and had to take off the front pocket first)
-fabric paint, paint brush
-freezer paper
-iron
-small scrap of fabric
-fusing (like Heat N Bond)

1. I found a picture of skull and bones online from Polish the Stars. Then I used my Sure Cuts Alot to cut out the image onto freezer paper on the circut. (I am still LOVING the cricut! My mom had to give the 'the talk' about sharing with my sisters. Bet she didn't think she would have to do that with her 30 year old daughter!).

2. Iron the freezer paper to your shirt. Then fill in with black paint. If you need more specific directions on freezer paper and using the cricut, see this old post: HERE


3. Remove freezer paper from shirt and it should leave the skull and bones neatly painted on your shirt. Awesome!

3. I used a cricut cartridge I had on hand to cut out a bandana shape. (It was the paper doll cartridge which has super cute stuff on there!). I ironed it on top of the skull, but be careful because the paint will smear. So try not to smear black paint all over your shirt! Then fill in with red paint. This took several coats to cover over the black skull.


4. After removing the freezer paper, I used the end of a paint brush to add white dots to the bandana. I did this to help blend the red because it didn't cover the black evenly.


5. I made a little party hat by cutting a small triangle from my scrap material. I then used fusing (ie Heat N Bond or Wonder Under) to iron it to the shirt. Again, be careful not to smear paint all over your shirt! I then took small strips of the scraps to make a little poofy part for the top of the hat. I sewed those directly to the shirt. And because I want to be extra cute, the scrap material is from a fabric bunting I am making for party decorations. John will match the decor! hahaha!


And there you have it. A precious pirate party shirt. I can't wait for John to wear it at the party! Like I said before, keep checking back to see what else I have up my sleeve for this party!


I link up to these parties!

Feb 3, 2011

Valentine's Day Shirts {with a tutorial!}

I finally got around to making Valentine's shirts for the boys. I hate making anything TOO holiday-ish because then they only wear it once or twice. I tried to make it a little more versatile (and not so Valentine's-y) so they can be my cute little love bugs all month long! :)

John will be in this heart breaker shirt because he is just so dang handsome that I KNOW he will be a heart breaker when he is older!


Matthew will look dapper and handsome in this sweet little heart tie shirt.


Want to make the heart breaker shirt for your little one? Here are the directions!

1. Using freezer paper waxy side down, cut out the letters for 'BREAKER' and iron onto your shirt. I used an xacto knife to do the cutting, but I am so horrible using that thing! Why is it so hard to do curves with it?! :( If you have a cricut or sillouette (and I am super jealous if you do!), you can cut the freezer paper on your machine which makes it tons easier to do.


2. Paint over your letters. I needed three coats of red since I was painting on a dark shirt.


Once the paint is dry, peel off the freezer paper!

3. Iron on fusing to the back of your heart material. I used Heat n Bond lite because I want to sew around the edges of the heart. Follow the directions on the package for using the fusing! Draw your shape and then cut out. I found a heart I liked online and used that as a template.


4. Iron on the heart to your shirt and you are done! (...unless you want to sew around the edges of your heart for a little extra pizazz, which I will do one day!)


Matthew's tie is super easy too so I didn't add directions. :) If you have questions, let me know!

I link up to these parties!

Oct 28, 2010

Halloween Shirt #2

Well, Halloween is this weekend and I never bought John a Halloween shirt! I made this one but he has only worn it once or twice. Is it just me or is it hard to match a grey shirt with shorts? (...assuming you are like me and don't have black shorts for your kid right now!) It is too hot to wear jeans, and quite frankly it is hot to wear long sleeves past 10 am!

So, I decided he need something a little snazzier for Friday when we are going to Brad's work where they have a HUGE Halloween celebration. The office is just short of shut down for most of the day as they put on skits, play games, and entertain. It is so fun! So, I had a black shirt from Walmart (still long sleeves, but oh well!) and I made a Halloween version of the 4th of July shirt.


If you kind of squint so that the white lines don't look so wavy, it is a pretty cute little shirt! I can't wait for John to wear it Friday and it is perfect because it will match Matthew's outfit which is also a black shirt.

So, which shirt do we like better? The graphic...


...or the argyle?


I can't decide which to put him in at the Halloween party on Sunday before he dons the pirate costume! I need your advice!


I link up to these parties!

Oct 9, 2010

Graphic Halloween Shirt - Tutorial!

Have I mentioned before that shopping for my precious baby boys is depressing? It is so hard to find cute boy stuff! I HATE that I go to a store like Target, Old Navy, or Kohl's (yes, we are on a budget here!) and there are racks and racks AND RACKS of girl clothes but only half the selection for boys. And usually the selction for boys have dorky/ugly cartoon figures. Yuck.

Thankfully my mom loves to shop for her grandkids and goes to the 'good stores'! So the boys always have some cute clothes from Janie and Jack which are a little too pricey for me. I am also thankful that I have found a couple fabulous blogs that seem to focus on making clothes for boys and among those I fell in love with I Am Momma - Hear Me Roar, who had a tutorial for a Captain America shirt. I saw this post a while ago and decided to try to make a Halloween shirt for John using a similar design.

How cute is John John?! (and he looks so old!)


So, here is how I made it.

Supplies:


-shirt (duh) I got this one at Target on sale for $1.50. Awesome!
-fabric paint
-brush (I used a sponge brush)
-freezer paper (I had to order mine from a hardware store. Weird!)
-iron
-scissors/Xacto knife

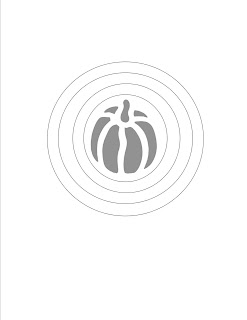
1. Print your design to whatever size you would like it to be. (I have heard you can print directly onto the freezer paper, but I always forget to do that! One day I will try it out!) Lay your paper over a sheet of freezer paper and cut out the parts of the design you want to PAINT. (see pic below for this to make sense!)

Here is the design I created on the computer using Microsoft Publisher and a pumpkin image I found on The Graphics Fairy.


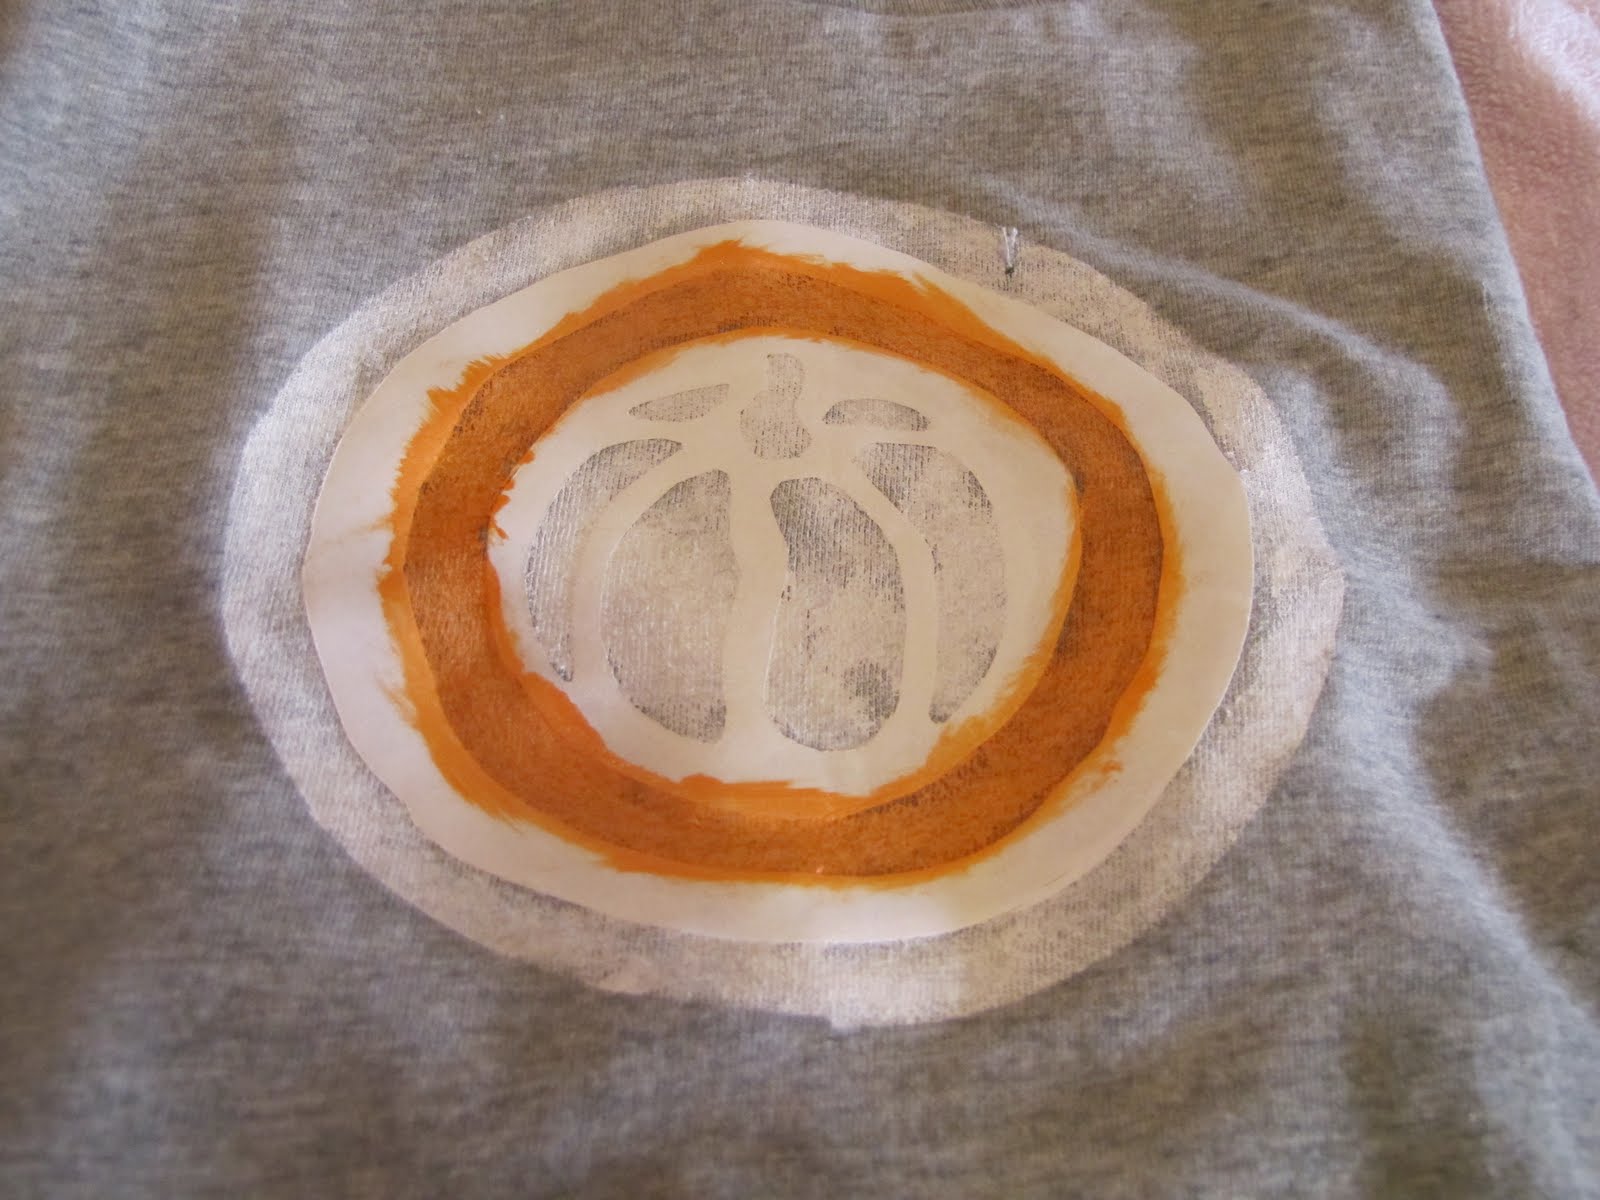
2. Iron the freezer paper to your shirt, waxy side down. This will create the stencil on your shirt. Looking at the picture below, you can see that I will paint the grey parts. Everything that is under the white freezer paper will stay grey since it is covered up by the freezer paper.


3. Start painting! I painted the pumpkin white and the outer circle white. I used a sponge brush and tried to paint it to look 'distressed' but kind of dabbing the paint around and not making it nice and fully painted.


Once it dried I painted the remaining ring orange, using the same distressed technique. Well, I am pretty sure it isn't a technique, but whatev.


4. Peel off the freezer paper to reveal your final product! To seal the paint, place a cloth over your shirt and iron.


5. Put on your favorite little pumpkin and admire.


Easy, cute, and cheap. My kind of project!

I think Matthew approves!


I link up to these parties!

Aug 30, 2010

Gap Inspired Baby Jeans

I went shopping today and saw these cute jeans at babyGap:


I thought I could use some of John's old jeans to make cute jeans like these for Matthew. Using freezer paper and white paint, this is what I came up with in all of 20 minutes.


These were some practice jeans because I don't think Matthew will ever fit into them! He is so dang big! I am not really a big fan of skulls and I wanted to use an easy stencil so I chose stars. A bonus was that I had a star punch so I didn't have to cut each one out! I used a sponge brush with VERY little paint to make it look distressed, although you can't really tell in the picture.

My model was sleeping the whole time, so here is the best way I could show them off! haha!


If I had to do it again I would put more stars across the pants. My excuse though is the star punch broke so I stopped making stars since these were just practice jeans. :) But I bet all you crafty people out there can come up with something awesome and I would love to see it if you do!

I link up to these parties!

Aug 4, 2010

Baby Matthew!

Baby Matthew is here! And how cute is he wearing one of the onesies my sisters and I made for him?!


So if I am not posting for a little while, you know why! :)

Jul 19, 2010

Big Brother design

As you may know, John is going to be a BIG BROTHER! Baby Matthew is coming next week so I really wanted to make John his very own Big Brother shirt. Nothing like waiting until the last minute, I created this design on microsoft two nights ago. I think it is really cute and was thinking I could make a freezer paper stencil with it and paint it onto a shirt. Easy peasy.


So, John and I took a trip to Walmart this morning and they had NO PLAIN SHIRTS! What?!?! (and sidenote: I get SO frustrated everytime I shop for John because the selection of boy clothes is miniscule compared to the girl clothes. Ummm...boys have to look cute too!)

So, for the time being, John may not have his own shirt. If I can drag myself to search for a plain shirt this week then John will be all cutesy. (my stomach reached full capacity a couple weeks ago and shopping for a plain shirt doesn't sound like something I want to do right now!)

BUT, I wanted to post this in case anyone wants to make one for their own kiddo...or friend, relative, stranger... {I am pretty sure you can click on the picture and save it. If that doesn't work and you want the file, just email me! :) }

If you make one, I would love to see it!

Jun 18, 2010

Baby Onesies

Baby Matthew will be here before I know it! So I found a bunch of John's plain onesies and invited my sisters and mom over for a night of crafting. (yes, we have matching TEAM CRAFT shirts! and yes, the pic is super dark...I apologzie!)


It was really fun (even though we missed mom being there!) and we made about 6 or 7 onesies for the baby. A couple still need to be sewn (the wonder under was giving us some trouble so I actually have to sew now!!), but here are a couple favorites.


I used a tie freezer paper stencil from Presser Foot and it is Brad's favorite onesie. It is precious! I tried to make suspenders like I saw somewhere in the blog world, but mine didn't turn out quite as cute. But, oh well!


My sister painted on the anchor since the baby's room will have a nautical theme. I think it turned out so sweet! I used a stamp to create the safety pin onesie. Kind of plain, but I am sure the baby won't notice!


I used a freezer paper stencil from Aly&Ash for the guitars. Then I just wrote in 'Mom Rocks'. This might be my favorite one...even if the writing is a little light!


Now we just need the baby to get here so we can try out our creations!