Oct 29, 2010

Thriller Flashback

Two years ago, when I was a cheer coach and thus had to plan all the pep rallies, I organized this teacher dance. Seeing as it is appropriate for Halloween coming up, I thought I would remenisce a little and share the dance with you! We had so much fun (it was our 2nd annual teacher dance) even though it was kind of a pain leading up to it. I put the dance together (after watching the Thriller video of course!), taught the teachers, etc. It was annoying trying to get a bunch of busy teachers together to practice and it was making me miss cheer practice with my girls. But the end result was perfect and the kids loved it! I am in the front in the middle by the W...you know...the one who was EIGHT months preggo!! :)


Here is a pic of me (on the left) with my assistant coach, Coach R. She had her make up done by the theater teacher which is why she looks WAY better than me!


Ahhh...memories...these are the fun things I miss about teaching. :)

I link up to these parties!

Oct 28, 2010

Halloween Shirt #2

Well, Halloween is this weekend and I never bought John a Halloween shirt! I made this one but he has only worn it once or twice. Is it just me or is it hard to match a grey shirt with shorts? (...assuming you are like me and don't have black shorts for your kid right now!) It is too hot to wear jeans, and quite frankly it is hot to wear long sleeves past 10 am!

So, I decided he need something a little snazzier for Friday when we are going to Brad's work where they have a HUGE Halloween celebration. The office is just short of shut down for most of the day as they put on skits, play games, and entertain. It is so fun! So, I had a black shirt from Walmart (still long sleeves, but oh well!) and I made a Halloween version of the 4th of July shirt.


If you kind of squint so that the white lines don't look so wavy, it is a pretty cute little shirt! I can't wait for John to wear it Friday and it is perfect because it will match Matthew's outfit which is also a black shirt.

So, which shirt do we like better? The graphic...


...or the argyle?


I can't decide which to put him in at the Halloween party on Sunday before he dons the pirate costume! I need your advice!


I link up to these parties!

Oct 27, 2010

Pumpkin shirt for ME!!!

So, I hardly ever make anything for myself. I really wanted something cute to wear at the pumpkin patch with the boys so I quickly threw together a pumpkin shirt. Then after making this shirt, I realized that since I don't have any daughters to make cutesy stuff, I can make it for myself!


To make this I just used a black shirt I already had (that I got for TWO DOLLARS at Old Navy!!) and some black and white fabric that I bought for a shirt for John. Throw in some heat and bond and some embroidery floss and call it a day! I like that it is cute but not too dorky and I can wear it for Halloween or just during the fall. I also ALWAYS wear black, so I figured the black/white/grey pumpkin suited me pretty well. This shirt was easy for me to make and took me all of an hour to make one night. What do we think?


I link up to these parties!

Oct 26, 2010

Skeleton Puzzle

To go along with our body parts theme this month, I found this skeleton at the dollar store. (I am really starting to love that place for inexpensive stuff for John!) John actually found it at the house before I could make the puzzle so while he was playing with it we pointed out the arms, head, legs, feet, chest, etc. Then a couple days later I traced the skeleton on a file folder and then cut up the skeleton. I gave John all the pieces and tried to have him put it back together on the file folder. He was pretty good at naming each body part but didn't really figure out placing them in a certain place on the folder! :) He had fun...and now we have creepy random bones around the house. :)


Don't we just use the most fancy high-tech games ever?! Don't be jealous..

I link up to these parties!

Oct 25, 2010

Pumpkin Patch Game Template {for older students!}

So, you know how yesterday I made up the pumpkin letters for the pumpkin patch matching game? Well, it was a modification of a game I thought of for teaching older students. I taught high school math for 8 years and this is my first year as a stay at home mom. So, my brain is still trained to think 'how could I use this in my classroom?' or 'this would a fun game to teach xyz.'. So, I made up a template for a pumpkin patch game. Teachers add in their own questions to each pumpkin (makes it quite versatile!) and post the pumpkins on the wall. Students pick a pumpkin from the 'patch' and if they answer it correctly, they get points depending on the size of the pumpkin they picked (bigger pumpkins have harder questions and are worth more points). The group who gets the most points wins! Want to check it out? Go HERE!

And yes, this is a shameless plug for myself. But, hey, it is my blog so I can do what I want! But to make up for it, how about a cute picture to look at?!


I link up to these parties!

Oct 22, 2010

Pumpkin Patch Game

I took the boys to a pumpkin patch today and on the way home I thought of an activity to do with my classes if I was still teaching math that deals with picking pumpkins off the board to work out problems. I figured you could use pumpkins for fall and not just Halloween. I am modifying the idea for John John! I made these pumpkins with letters on them:


Then I was thinking of how I could use them:

1.Make two copies of them. One set will be cut up and hung on the wall or maybe even outside on the fence. The other set will also be cut up and in a stack. When he draws a card from the stack, he would have to find the matching pumpkin and pick it off the wall. Would be cute if he had a little basket or wagon to put it in!

2. Make one copy, cut up, hang. Then I can just call out letters for John to find and pick.

3. Make one copy, cut up, hang up around the house and he has to go find all 26 pumpkins. Then we could practice putting them in alphabetical order.

That is all I have thought of so far but John is wanting lunch. Geez...I have to feed him AND teach him letters?!?! :)


I link up to these parties!

Oct 18, 2010

More Candy Corn Letters

I finished the rest of the candy corn letters! So, now you can save a copy of the full alphabet. Yeah! Here they are- take it if you want it! (and yes I realize the first page isn't in alphabetical order. sorry!) If you missed the posts where I talked about these candy corn letters, check back HERE and HERE. Enjoy!


I link up to these parties!

Oct 14, 2010

Google Reader = My Addiction

I started blogging as part of an assignment when I was taking a professional development class about 2 years ago. I had never really seen blogs before (guess I am SUPER behind the times!) and didn't really know what they were for. The point of the class I was taking was to learn more ways to bring technology into the classroom and although I still don't know how I would use a blog in a high school math class, I have become almost addicted to reading blogs to get new ideas for all kinds of areas in life. As far as education, I honestly feel I got more ideas for my classroom by reading blogs compared to sitting through professional development that the school offered. I guess that would make sense considering usually professional development is general and I can use blogs to address specific and personal needs. I love that I can learn new ways to teach my class (when I was still teaching!) as well as find activities to do with my sons, get ideas for birthday parties, holiday decorating, baking, keep family members in the loop on our lives...you name it, it is out there which is so awesome!

Anyways...this is a long way to get to my point of this post. I learned how to use Google Reader in this class. I was so confused at first- what the heck is a feed burner? a reader? a subscription? But once I started using it, I realized how awesome it is! I know there are more ways to keep up with blogs but since using Google Reader is the only 'organizer' I learned to use, this is what I am going with here. :)

So, I am going to show you how to set up a Google Reader so you can easily keep up with all of your blogs in one place! (If you are like me, you might be following or subscribing to about 100 blogs which can be overwhelming!). And I know the pictures are small, but you can click on them to enlarge!

1. First you need to make a google account if you don't already have one. Then sign in!

2. Go to 'My Account' and click on 'More' at the bottom left.


3. Find and click on 'Reader' on the right column.


4. I always click on 'All Items' on the far left column. If you don't follow any blogs or subscribe to any blogs, your reader will say "Your reading list is empty". If you do follow blogs (which I am sure you do!), it will list the blogs you follow and any posts that you haven't read. Awesome!

Here is what my reader looks like:


Yikes! It is showing that I have over 300 posts I haven't read yet. But, that is because I subscribe to SO many blogs that I tend to only read the posts that interest me and not EVERY SINGLE post that is written. Sorry guys!

If you follow any more blogs, they will automatically be added to your blogger. So now you can just go straight to your reader to see all the new posts on your favorite blogs instead of jumping from website to website to website to website...

At the bottom left, there is a link to 'manage subscriptions'. You can go there to delete and update your reader.

Want to learn more about how to add subscriptions to your reader? Check back soon for another 'how to' for the google reader! :)


I link up to these parties!

Oct 13, 2010

Infant Parrot Costume

For Halloween this year I wanted the boys to have coordinating costumes. I also wanted something easy because I knew I wouldn't have a ton of time to put it together. I found a pirate's costume for John on sale at Carter's for about $13 so I figured Matthew could be a parrot. My plan is to use cardboard to make their wagon into a ship! I am so excited!

So, I made Matthew's parrot costume all by my lonesome! :) It was super easy (which means it also isn't fancy!) For a baby who will be in a stroller on Halloween night, I think this is good enough, don't you?


In case anyone else wants to make a quick parrot costume, here is how I threw it together.

1. I started with one of John's old white onesies and dyed it red using the directions I found on Made. This was my first time dyeing anything and it was pretty easy! I didn't do a great job of making it a consistent color across the onesie, but for a Halloween costume it did the trick.


2. Using felt I cut out the feathers for the arms. I used red for my biggest piece and then layered on the yellow and blue. I used fabric glue to hold it all together. (No sewing for this project!) Once the pieces were glued together, I glued them to the sleeves of the onesie, folding the feathers over the top of the arms.


**The sleeves of the onesie are longer than Matthew's arms so they will be rolled up when he actually wears the costume. So if you make this, be sure to make the width of your feather pieces go the end of your child's arms!**

3. I layed the back pieces the same way except I kept the pieces straight across the top so I could attach it right at the waist line.


**and how cute would this be if I had trimmed the edge of the feathers at the waist line with ric rac?! But I didn't have any in my stash of ribbons. darn!**

So, there is it! An easy and cheap homemade costume!


I can't wait for my cuties to get all dressed up! Are you making any cute costumes? I would love to see them!

I link up to these parties!

Oct 12, 2010

Mr. Pumpkin Head

As part of our body parts themed activities, I made a Mr. Pumpkin Head game for John to play with. It was really easy to make! I printed a picture of a pumpkin (just did a google search!) and found printable Mr. Potato Head parts from 2 Teaching Mommies. I also found funny faces from Missie Krissie and printed those out. After cutting out the body parts and laminating them (thanks to my $5 laminator I found at a garage sale! so exciting!!!), I attached them to magnets.


What type of magnets you might ask? These bad boys.


Yep- I used advertising magnets. Free! Awesome!

And ta da...a magnetic Mr. Pumpkin Head game! Easy and green to boot! Since these magnets won't scratch up my fridge, John can play on the fridge or he can play in the living room using a baking pan. Think of all the creative possibilities John has!


If I was super motivated, I could find more pictures to make different faces (more arms, feet, etc)...but I am not that motivated when I stop and think about it! :)

And PS, since John is young, I decided against the traditional pumpkin face pieces (triangles, etc) because I didn't know if he would know where to put those. But that would be cute for older kids too!


I link up to these parties!

Lake Matthew sign

Remember this post on Matthew's nursery? Well, I got the Lake Matthew sign back in August and I LOVE it! I just never posted about it. Oops! :) Here is a picture of the sign with the frame my dad made. Don't you just love it?!


I love how it is slightly distressed and it is PERFECT for his room!

Here is what that wall looked like before...


and the after...


It is hard to tell from the pictures, the but the sign is pretty big. I would guess about 2 feet by 2 feet including the frame. We have tall ceilings in our house which is pretty but leaves a lot of space to fill up! :) My favorite part is my rocking chair is across from the sign so I can look at it when I am rocking sweet Matthew! Love it!


I link up to these parties!

Oct 10, 2010

Halloween Tot School

John is 22 months!


This past week we started our month of Halloween/Fall activities that will review shapes, letters, numbers, etc and work on naming different body parts. Kind of a random month! I am basically do lots of Halloween crafts and games and making them fit into some category. :)

Here is what we did!

Cat Shapes
I made these cat shape printables and made three copies of them. I taped each type of cat to the back of a tuperware container and put the rest in a stack. John then sorted them into the correct containers. He really liked it, but it took all of 30 seconds for him to do and then he started trying to tear off the taped cats! So, it seems I needed to make it more challenging for him!


(once again, blogger is rotating my pictures! sorry that you have to tilt your head for this one!)


Candy Corn Letters
I also made these candy corn letter printables for this week. After getting great ideas from The Activity Mom, I made two copies and taped each letter to a paper 'trick or treat' bag. John then had to put the matching letter in the correct bag. He REALLY enjoyed this new way of matching. Some the bags even had treats in them (a little snack!) which was cute. One thing I was really impressed with was John would take the card in his hand and put it up against the cards on the bag to compare to see if it was a match. I also was impressed that after doing this game about two times he could say all the letters from A - I and easily match up all the cards to the correct bag. I now have to go back and make the candy corn letters from J - Z! I am always amazed at what John can do and how quickly he learns. It is so exciting!


Halloween Eraser Sorting
I saw cute Halloween erasers at the Dollar Store. I loved them for John because they are big enough that I am not worried about him choking on them and there were 2 sets of 6 different erasers in each package. So, I bought two packs for John to sort using my pumpkin shaped cupcake pan. (At the Dollar Store I also saw cute Halloween ice cube trays that would be cute to sort into but figured I didn't need to spend more money!) John sorted them twice and seemed to enjoy it. Then I would put some in the wrong spots and he had to fix my mistakes.


Handprint Bats
We made bats using a tracing of his handprints. Well, a close enough tracing- he wasn't really wanting to let me trace his hand so I got it wet from a damp cloth and put his hand on the construction paper. Then I quickly cut that out! As we made the bat we talked about where his hands, belly, head, eyes, ears, and teeth were and where we should put the construction paper on the bat. We also made a second bat picture using Matthew's hands- so cute! John LOVED the googly eyes! He even tried to eat one...after it had glue on it...gross!


Fall Sensory Bin
I saw someone's fall sensory bin (and of course I didn't save the blog but this certainly wasn't my idea!) and bought the material at the Dollar Store: acorns, leaves, pinecones, & gords. I mixed in beans and different pouring containers. He loves playing with the beans! I was so excited because while we were cooking tonight I heard some noise in the dining room- John had pulled the bin off the dining room table and wanted to play with it! Yeah!
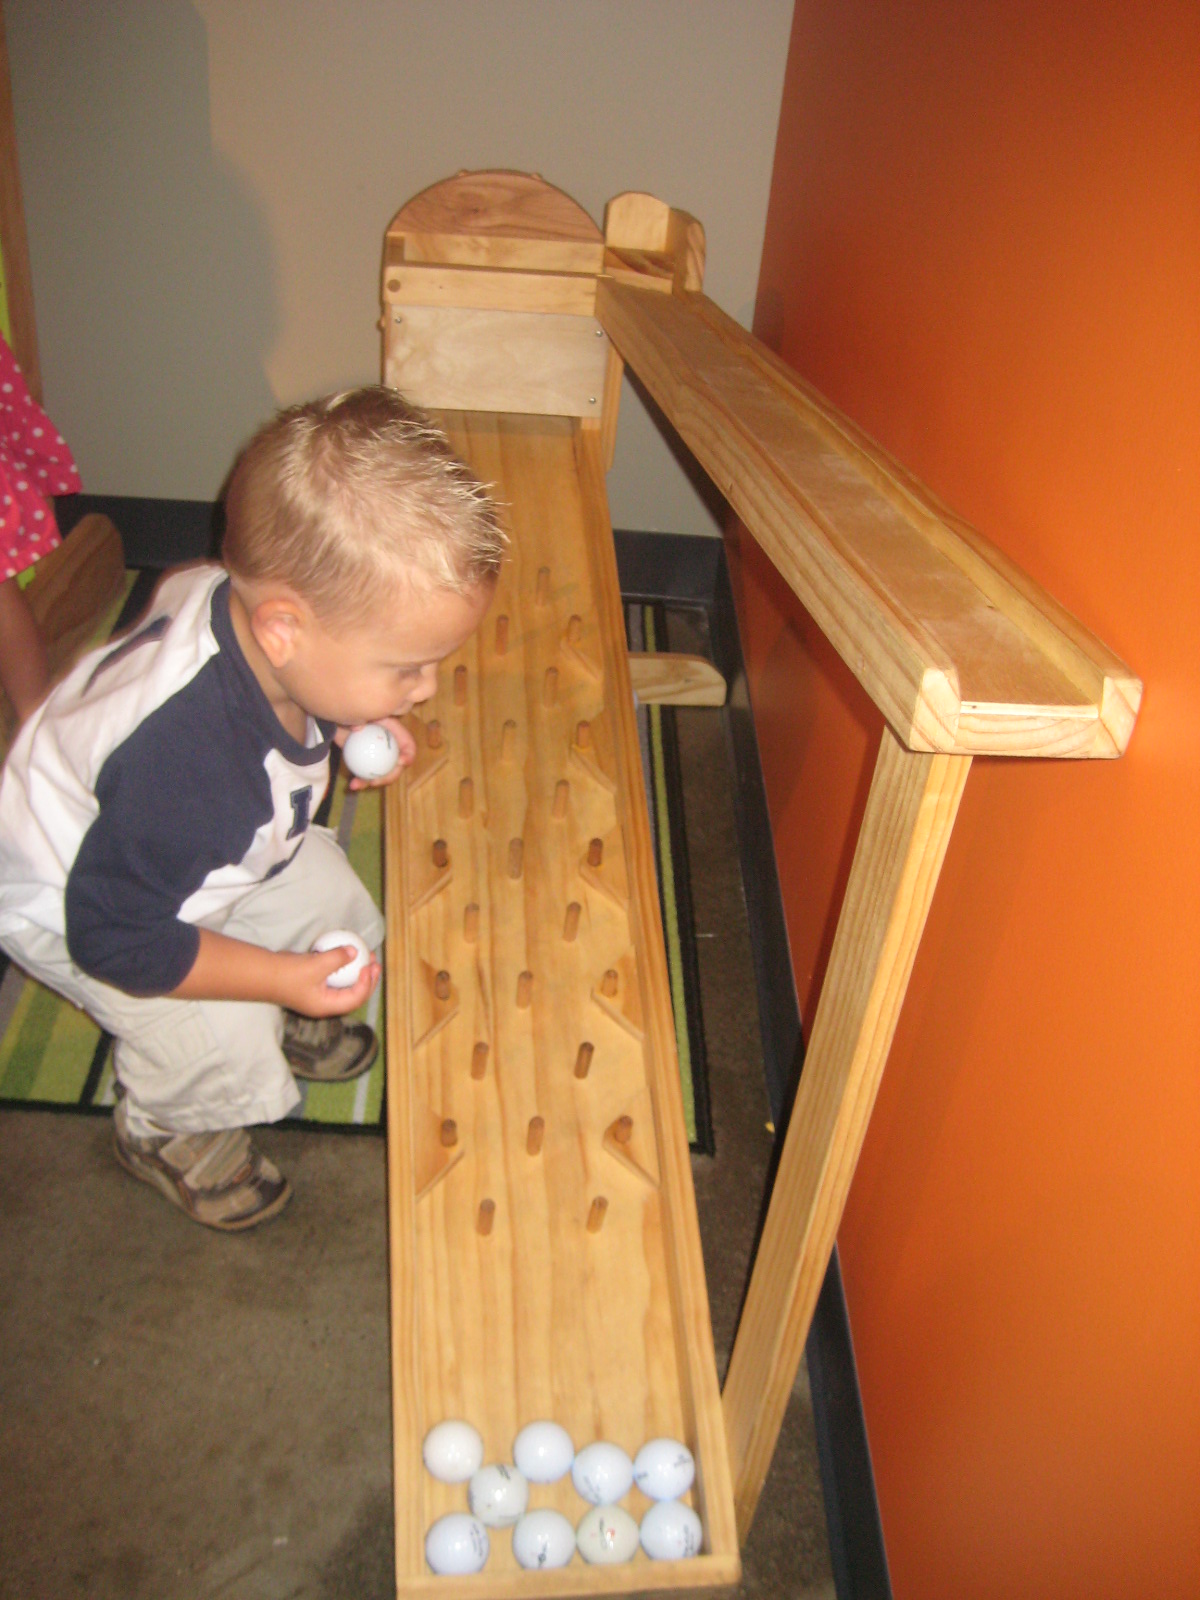
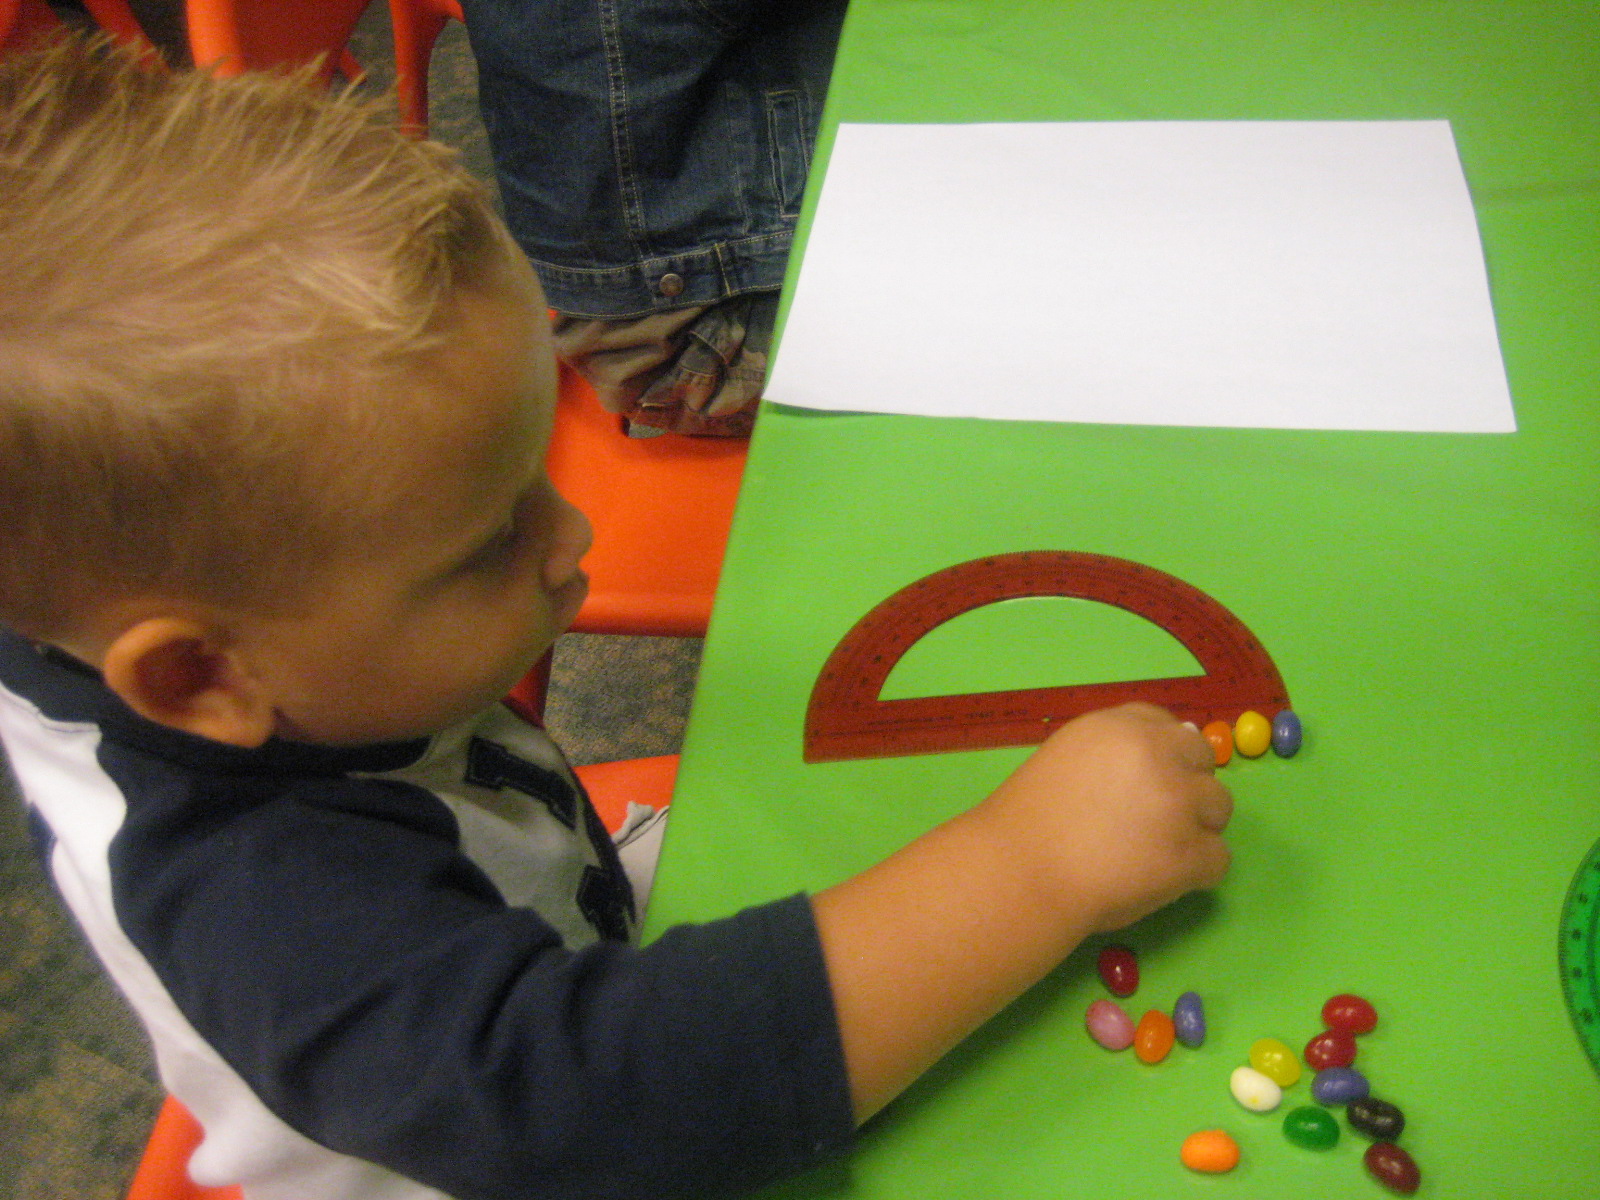


Math Midway
Well, this doesn't really have anything to do with Halloween or the fall, but I took John to the Frisco Discovery Center where the Math Midway was on display. We went with some of the other moms and kiddos from our playgroup and everyone loved it! John played with one game the majority of the time and since I had to nurse Matthew while I was there (ugh...not ideal for taking John out!) we didn't see everything. I am going to take him back for sure because it wasn't too expensive and he loved playing with everything. Lots of problem solving activities were there so it was awesome! If you are close to Frisco, TX, you should take your kids there!


So, as usual, we ran out of time for all the things I wanted to do. Here is what was on my schedule but we didn't get around to:

-making foot print ghosts
-making hand print spiders
-making hand print owls.

Time flies when we all take 2+ hour naps in the afternoon! :0


I link up to these parties!